Pages

Wednesday, 30 November 2011

Cooking Goal: Black Bean Soup

Doesn't this look so wonderful? And the recipe is so simple; I always love that!
Check out the recipe at Comfy in the Kitchen

Tuesday, 29 November 2011

Cherry Chocolate Cheese Cake

 My dad was going away and he was going to be away still when his birthday happened so I got it together and baked him a cake and had him over. His favorite cake is black forest so I thought this would be pretty close (I wanted to used what I had in the house)
 Ingredients
1 pkg (each 8 oz/250 g) cream cheese
1/2 cup granulated sugar
2 eggs
1 tbsp lemon juice
1 tsp vanilla
1 Pinch salt
1 1/2 cups sour cream
3/4 cup of pitted cherries
1 bar of chocolate (or as much as you want!)


Crust:
10 graham crackers 


Preparation

1. Crust: Layer the graham crackers at the bottom of a 7'' spring form pan

2. In large bowl, beat cream cheese until softened. Gradually beat in sugar; beat for 3 minutes or until smooth and light, scraping down bowl twice. Using low speed, beat in eggs, 1 at a time, beating well after each addition and scraping down bowl often. Blend in lemon juice, vanilla and salt, then sour cream. Pour over crust.

3. Bake in centre of 325°F (160°C) oven for 1-1/4 hours or until shine disappears and edge is set yet centre still jiggles slightly. Let cool. Service with chocolate or cherry sauce or ice cream!  

Monday, 28 November 2011

Baking My Way: Orange Cappuccino Drops


I’m not much for coffee, in fact I don’t drink it at all, and most times I don’t even like the smell, but my husband on the other hand he loves it. He’s tried to “convert” me for years but he hasn’t gotten very far.

I always flip the pages in my cook book to the ones with pictures, and I’m guessing like most people I usually try the recipes with the pictures first. For this recipe the picture looks really really good and I thought of doing them for Marshall so I gave them a try. (It was a good thing we had instant coffee in the house cause I don’t even know how to make coffee right!)

The cookies turned out exactly like in the picture and Marshall says they taste great (I can’t tell cause I don’t like the taste of coffee) so if you’re a coffee lover you’ll love these!

Rating: I give these a 2, only because I don't drink coffee (1 being "I'll never bake them again" and 5 being "They are now one of my favorites")

Cookies:
1 cup Firmly Packed Brown Sugar
½ cup Butter
2/3 cup Sour Cream
½ cup Strong Coffee
3 oz. Chocolate Chips, melted, cooled (dark chocolate is best)
1 tsp Vanilla
1 Egg
2 cups Flour
½ tsp Baking Soda

Frosting:
2 cups Icing Sugar
2 tbsp Butter
1 ½ tsp Grated Orange Peel
2-3 tbsp Milk

Cookies: Heat oven to 375. combine brown sugar, butter; beat until light and fluffy. Add sour cream, coffee, chocolate, vanilla, and egg; blend well. Add flour and baking soda; mix well. (dough will be very soft). Drop dough by teaspoonfuls 2 inches apart onto ungreased cookie sheet. Bake for 5-7 minutes. Cool until completely cooled.

Frosting: Combine all ingredients. Add enough milk for desired consistency. Frost cooled cookies.

Tip: Use 2-3 tablespoons of instant coffee in ½ cup boiled water instead of having to make a whole press or pot of coffee.

Have any good ideas, or substitutes for this....share them, leave a comment, I’d love to hear from you!!

Sunday, 27 November 2011

Savory Sunday

Orange Marmalade Whole Wheat Muffins from Let's Talk Dollars & Cents


Beef Bourguignon from Katie-Kate's Kitchen

DSC00376

 Apple Cream Cheese Bundt Cake from Picture Perfect Cooking


Thai Chicken Pizza from Mostly Food & Crafts


Chicken Enchilada Nachos from Like Mother, Like Daughter

Here's how it will work:

1) Link up to the link below (link as many as you want but try to link something savory if you can)
2) Grab the Savory Sunday button and put it in the post you are sharing
3) Leave a comment after you post
4) I'd love for you to become a follower if you're not but it's not a requirement :)


Saturday, 26 November 2011

Baking My Way: Brown Sugar Shortbread Cookie Dough


This recipe on it's own isn't thrilling but I love that from this recipe that give you three other wonderfully tasty recipes to use. I love all the options! Stay toned for all of those (listed below!)

Ingredients
3/4 cup sugar
3/4 cup firmly packed brown sugar
1 cup butter, softened
1 teaspoon vanilla
1 egg
2 1/2 cups All Purpose or Unbleached Flour


Directions
In large bowl, combine sugar, brown sugar and butter; beat until light and fluffy. Add vanilla and egg; blend well. Lightly spoon flour into measuring cup; level off. Stir in flour until well blended. Divide dough into thirds; cover with plastic wrap.

Use as directed to make Cherry Chocolate Brown Sugar Shortbread Bars, Jam-Filled Brown Sugar Shortbread Cookies or Maple Nut Brown Sugar Shortbread Cookies.


(I ended up putting some left over icing on these cookies and it made them a good 80% better then plan. Just a tip!)

Friday, 25 November 2011

Tootsie Roll Fudge

I saw this recipe and thought I'd give it a go with my own adaptation. I think it turned out great and the "OH......UMMMM....." almost moaning reaction I got from my husband means it passed the taste test in our house!


Ingredients
1 tablespoon Butter
2 cups Tootsie Roll Midgees
2 tablespoons Peanut Butter
3 cups Icing Sugar
2 tablespoons Milk
1 teaspoon Vanilla
1/2 cup Pretzels

Directions
Line a 9-in. square pan with wax paper. In a heavy saucepan, melt the Tootsie Rolls, peanut butter and butter over low heat, stirring constantly. Gradually stir in the confectioners' sugar, milk and vanilla (mixture will be very thick).

Spread into prepared pan. Crush the pretzels and sprinkle on top (I pressed them in a bit to get them to stick to the fudge). Using a sharp knife, score the surface into 1-in. squares.

Cool. Using the wax paper, remove fudge from pan; cut into squares. Store in an airtight container.

Thursday, 24 November 2011

Baking My Way: Cardamom Shortbread Wedges

I wasn't too sure what I was going to think of this recipe because I had never baked anything with Cardamom before but wow these are some seriously tasty wedges! I made half a recipe so I used a small (6''?) cheese cake pan and it worked out great. I was sure not to over bake so that they stayed nice and soft. I recipe says just to drizzle the icing over top but I made too much and just spread it over the whole top. It's not has pretty for presentation but they are so tasty I don't think it really matters!


INGREDIENTS

COOKIES
1/3 cup sugar
1 cup butter or margarine, softened
2 1/2 cups All Purpose or Unbleached Flour
1 to 3 teaspoons cardamom
1 teaspoon vanilla
1/4 teaspoon almond extract

GLAZE
1 cup powdered sugar
1/4 teaspoon vanilla
1/8 teaspoon almond extract
1 to 3 tablespoons milk

DIRECTIONS

Heat oven to 350°F. Line two 9-inch pie pans with aluminum foil so foil extends over sides of pans; spray foil with nonstick cooking spray. In large bowl, beat sugar and butter until light and fluffy. Lightly spoon flour into measuring cup; level off. Stir in flour and remaining cookie ingredients; mixwell. Dough will be crumbly. Divide dough in half; press in bottom of lined pans.

Bake at 350°F. for 18 to 22 minutes or until light golden brown. Cool in pan l0 minutes; remove cookies from pan by lifting foil. Cut each shortbread into 16 wedges while warm; run knife around edge of pan to loosen.

In small bowl, combine all glaze ingredients, adding enough milk for desired drizzling consistency. Drizzle over cooled cookies. Carefully remove from pan. Store in loosely covered container.

Recipe Source 

Health Tip of the Week: Foot Detox


My mom works at a health clinic and on my quest to get rid of the headaches I mentioned before I tried doing foot and hand detox. Most places don’t mention or suggest hand detox, but you can do it just like you do it on the feet, and at the same time for even more of a cleanse.


Although I still struggled with my headaches after my string of 6 foot and hand detox sessions I felt meny of the other benefits listened below and I think it’s for sure worth doing.


Think of all the crazy toxins we take in daily, often without even knowing! I for one don’t want them in my body!

“Ionic Detoxification Footbaths are the most relaxing way to get rid of the toxins present in the body”. Says Healthy Being Wellness Boutique

At most clinics have their detox run from 24-35 minutes, depending on the person. Also most clinics will serve you cleasing cucumber water to accompany the cleanse.

Detox Foot Bath is an all natural way to detox the inside of your body through your feet. Detoxification begins the moment you place your feet into the foot bath. Detoxification benefits your health and can help the aging process.

Some Reported Benefits:

* Detoxification of Your Entire Body
* Heavy Metals Removed
* Increase Your Energy
* Help With Faster Disease and Injury Recovery Time
* Increased Oxygen in Your Body
* Help Pain Relief
* Improved Your Sleep
* Reduced Unwanted Fluid Retention
* Headache Relief
* Immune System Booster


How often should you do a foot detox?

Some say once a week, some say once a month, it all depends on the person, and the problems you might be experiencing. Note: Foot detox sessions take out toxins as well as other things that are foreign to your body; this includes medications so please take that into consideration beforehand.

Tuesday, 22 November 2011

Baking Goal: Bavarian Peach Torte

Doesn't this look so tasty and so fresh?
Check out the recipe at Scrambled Henfruit

Monday, 21 November 2011

Bread Pudding

This was my first time making bread pudding and I'm really excited now about all the options out there on different variations. This recipe is super simple and I love that you can use up all those loaf ends (that no one in my house wants to eat)!

Ingredients
6 slices day-old bread
2 tablespoons butter, melted
1/2 cup raisins (optional)
4 eggs, beaten
2 cups milk
3/4 cup white sugar
1 teaspoon ground cinnamon
1 teaspoon vanilla extract

Directions
Preheat oven to 350 degrees F (175 degrees C).

Break bread into small pieces into an 8 inch square baking pan. Drizzle melted butter or margarine over bread. If desired, sprinkle with raisins.

In a medium mixing bowl, combine eggs, milk, sugar, cinnamon, and vanilla. Beat until well mixed.

Pour over bread, and lightly push down with a fork until bread is covered and soaking up the egg mixture.
Bake in the preheated oven for 45 minutes, or until the top springs back when lightly tapped.

Mile High Mocha Mud Pie

I love mocha mud pie! When I was little after church we would always go to the Morden motor inn and I would convince my dad (almost every time) to let me have it for desert. I haven’t found a place that can do it as well, but this recipe seems to be pretty close!


□ 4 c. Vanilla Ice Cream (slightly softened)
□ 1 (9") ready-made Chocolate Pie Crust
□ 1/2 c. creamy Peanut Butter
□ 4 c. Mocha Almond Ice Cream (slightly softened)
□ 1 c. Chocolate Fudge Sauce (armed)
□ Whipped cream
□ 1/2 c. slivered Almonds

Spread vanilla ice cream evenly in pie crust, smoothing top; freeze 30 minutes.

In glass container in microwave or in small saucepan over low heat, melt peanut butter until smooth and spreadable; spread over vanilla ice cream. Freeze 30 minutes or until hardened.

Spread mocha-almond ice cream over peanut butter, mounding high toward center of pie; smooth surface. Freeze 6 hours or overnight.

To serve: Cut pie into 8 pieces. Top each piece with 2 tablespoons fudge sauce, whipped cream to taste, 1 tablespoon slivered Almonds.

Enjoy!

Sunday, 20 November 2011

Savory Sunday


I want to start off by saying I am by no means a video game fan but my husband was watching all sorts of videos and we came across this one and...wow! I just had to share this with you! If all video game pros were like this I would take up the hobby. And WOODKID? Yep, I'm a fan now! 

Now to the food!

P1090433

Chicken & Dumplings from Permanent Posies


P1090483
P1090479
   
Creamy Banana Nut Cake with Vanilla Bean Frosting from Permanent Posies

DSC00475
Corn Muffins from Picture Perfect Cooking


 Whole Wheat Pizza Puffs from Kuzak's Closet 


Artichoke Crusted Salmon from Like Mother, Like Daughter


Here's how it will work:

1) Link up to the link below (link as many as you want but try to link something savory if you can)
2) Grab the Savory Sunday button and put it in the post you are sharing
3) Leave a comment after you post
4) I'd love for you to become a follower if you're not but it's not a requirement :)


Saturday, 19 November 2011

Guest Post: Kim from Little Rays of Sunshine


Thank you for taking the time to get to know me! 

My name is Kim and I am a SAHM to our beautiful one-year-old daughter Emma, as well as to our spunky Yellow Lab Max. I am completely blessed to have no other job than taking care of my family each and every day.
 

However, it took a little time and a lot of heartache to finally get here. After two years of marriage, my husband and I embarked on what would be a painful journey to becoming parents. We endured four miscarriages before eventually finding the source of my early pregnancy issues. Fortunately,
it was an easy fix with a small and simple surgical procedure. Three months after undergoing surgery, we again became pregnant. This time, praise the Lord, we welcomed our precious baby girl into the world a mere nine months later!
 

While there are so many other little details that describe me—child of God, oldest of three
girls, reading enthusiast, Hokie for life, Irish and proud, super big appetite
and super huge sweet tooth, Virginia "southerner"—I start with the story of Emma because the past three years of my life have come to define me. Our journey to having her was my original motivation for starting a blog, and while it has seen a wonderfully fun transformation into a place where
recipes, crafts, and posts of all kinds are shared, I never want myself to lose sight of where I come from and what has brought me to this happiest of places today!


My blog is called Little Rays of Sunshine, and it is very appropriately named. My husband Scott and I feel like we are living every day in the sunshine of our little girl, watching her grow and change with each passing moment. It's so easy to get bogged down by the stresses of everyday life, but no matter
what each day might bring, Emma's beautiful face reminds us of the blessings we have in
this life. 

I am so excited to be sharing life with my readers as we live it, and while I know there will be days where I share the good, the bad, and the ugly, my hope is to find those little rays of sunshine to focus on and be grateful for. Whether it is new and tempting recipes, DIY craft ideas, or just a day full of pictures that capture my darling baby at her best, there are so many things that simply make
life worth living! I hope you will find as much joy in following us as I will in bringing you along for the ride! 
God is my source of strength in this life. I turn to my Him for all things, including this life verse that is near and dear to my heart: “Trust in the Lord with all your heart and lean not on your own understanding; in all your ways submit to Him, and He will make your paths straight.” ~Proverbs 3:5-6

 Now, on to the cooking!

My absolute favorite kitchen tool 

has got to be my large, green, cast iron skillet. It cooks like none other. The best dinner in the entire world to whip up with this bad boy is a pan-seared steak. A lot of salt, a lot of
pepper, a good helping of butter, and bam. You have yourself an easy and delicious dinner! 

As much as I love cooking scrumptious meat for my hubby, though, I completely adore baking up a storm in our kitchen... whenever possible. We are now into one of the best times of year for baking--Fall! Fresh apples, spicy pumpkin, warm pies... it all makes me drool. The recipe I want to share with you now is a twist on my Grammy's cheesecake cups. Made with a traditional cream cheese filling and Nilla Wafer crust, these little treats are always gobbled up fast. I've recently been wanting to try my hand at making a pumpkin cheesecake, and after a brief moment of enlightenment, it dawned on me that this would be the perfect recipe to start with. It's quick, it's easy, and it's ALWAYS a winner.

It only took a few minor tweaks to turn these classic cheesecake cups into a Fall-worthy dessert. The Nilla Wafers were swapped with Gingersnaps, and the addition of both canned pumpkin and pumpkin pie spice turned this creamy cheesecake batter into one that boasts all the flavors of a scrumptious and satisfying pumpkin pie.

I hope you'll try this recipe and enjoy it as much as we have. There's no way to mess up and nothing to fear. The easy peasy Pumpkin Cheesecake Cups are here! (Sorry. I'm a dork.)


Pumpkin Cheesecake Cups

2-8 oz packages of cream cheese, softened
3/4 cup white granulated sugar
2 eggs, at room temperature
1 tsp vanilla extract
1 tsp pumpkin pie spice
1 c canned pumpkin
24 gingersnap cookies

  1. Preheat oven to 375 degrees F.
  2. Line muffin tins with foil liners and place a gingersnap cookie in the bottom of each one. Set aside.
  3. In a large bowl, beat cream cheese with an electric mixer until smooth. Add sugar, eggs, vanilla, and pumpkin pie spice; continue beating until well-incorporated and smooth.
  4. Beat in the pumpkin until combined.
  5. Fill each muffin cup 2/3 full with batter. Bake 10-12 minutes, until edges are firm and centers slightly jiggle. 
  6. Remove the cheesecake cups from the muffin tin and place on a cooling rack to cool completely. Once cooled, store in an airtight container in the fridge. 


Eat these tasty Fall treats to your heart's content and enjoy their decadent, pumpkin-y flavor!


Thursday, 17 November 2011

Health Tip of the Week: Clean Air

The other week I went with my mom and Marshall to the Health Expo. I love going to those sorts of things and finding new products, or new things I could do to be healthier.


As we were walking around I smelt the air changed. I looked around and sure enough we were coming up to a air filtration booth. We stopped and talked to the reps for a while and ended their draw for a rental of one of their units. They were really informative, and I was really interested but you know you never know how well those things work until you try it out yourself right? Well turns out I won! They brought the unit over last Friday and I had it till Monday.


I was really excited about that because we wanted to get something in our house (when we buy one) but like I said, it’s hard to know which one to get.

So we had it on in there and it was amazing the difference you could notice. We had the bedroom door closed for a while, and when I went in there I asked Marshall “what’s smells in here? Is there something rotting or something?” but it was just the air! Isn’t that so bad?

Anyways, so coming from a happy “customer” I thought I would share this find. It’s an expensive product, but I think it’s so worth it. It’s the air we breathe after all!

Hydroxyls (·OH) are safe, naturally occurring molecules that are created in our atmosphere when the sun's ultraviolet rays react with water vapor.
ODOROX Hydroxyl Generators replicate this natural process.
ODOROX implements a dual process attack on contaminants.


1. The processing chamber sanitizes airflow and produces hydroxyls (·OH).
2. The hydroxyl (·OH) molecules exit the chamber to decontaminate surfaces and contents.


Processing Chamber
· Contaminated air is directed into the chamber where ambient humidity and multiple nanometer wavelengths and frequencies combine to create an oxidizing formula and produce hydroxyls.

· The quartz crystal optics are finely tuned to deodorize air flow, eradicate bacteria and other microorganisms, and produce hydroxyl molecules.

· The purified air is recycled back into the environment along with hydroxyls to further decontaminate surfaces & contents.

The Odorox Cascade Effect

· Once the hydroxyls are created, they are sent to "seek and destroy" odor molecules, bacteria, viruses, mold, VOCs and other chemicals.
· Notably, the process simultaneously decontaminates the air, surfaces, and objects.
· This system does not require all of the contaminants within a room to pass through the processing chamber, which guarantees a more rapid and thorough decontamination.


Representative Organisms
Influenza type A viruses are the most dangerous human pathogens among the influenza types and cause the most severe disease. Influenza epidemics result in 250,000 to 500,000 deaths globally each year.

Listeria monocytogenes is a gram-positive, rod-shaped bacterium responsible for listeriosis, a lethal food-borne infection that has a devastating fatality rate of 25% (Salmonella, in comparison, has a less than 1% mortality rate). It is incredibly hardy and able to grow in temperatures ranging from 39°F (4°C) to 99°F (37°C).

C.difficile is a spore-forming, gram-positive bacillus that causes potentially life-threatening colitis. Its spores can survive outside the human body for months on surfaces including bedrails, commodes, bedpans, thermometers, wheelchairs, endoscopes, bathing tubs, and the hands of health care workers.

Porcine Reproductive and Respiratory Syndrome (PRRS) is a small, enveloped RNA virus that causes a disease of pigs. This economically important pandemic causes reproductive failure in breeding stock and respiratory tract illness. The PRRS virus cost the US swine industry in excesses of $560 million in losses each year.

Wednesday, 16 November 2011

Butternut Squash Soup

I think next time around I would put a lot more chicken broth because it's a super hardy soup but it was super tasty and perfect for fall!


Ingredients:
1 Tbsp. olive oil
2 butternut squash (2 lb./900 g each), peeled, seeded and cut into chunks
1 onion, chopped
1 clove garlic, minced
1/2 tsp. ground allspice
2 cans (10 fl oz/284 mL each) 25%-less-sodium chicken broth
1/2 cup light sour cream, divided
Premium Plus Crackers


Directions: 
HEAT oil in large saucepan on medium heat. Add squash, onions and garlic; cook 5 to 10 min. or until crisp-tender, stirring occasionally. Stir in allspice; cook 1 min.

ADD chicken broth. Bring to boil; cover. Simmer on low heat 15 min. or until squash is tender. Add, in batches, to food processor; process until smooth. Return to saucepan; cook until heated through, stirring occasionally.

LADLE soup into 8 bowls. Add 1 Tbsp. sour cream to each; swirl gently with spoon. Serve with crackers.

Adapted from here

Tuesday, 15 November 2011

Candy Corn Cookie Bark

So I saw this recipe and thought I'd make this one my way too! (Like I do with every recipe right?)


1 1/2 cups white chocolate waffers
1 cup dark chocolate
1 cup crushed pretzel pieces
1 cup crushed chocolate biscuit pieces
3/4 cup candy corn


Lay out a piece of wax paper. Spread candy corn, pretzel and chocolate biscuit pieces on the wax paper.

Melt the white chocolate and pour it over the goodies on the wax paper.

Melt the dark chocolate and spread it over the white chocolate. Make sure you cover all the goodies so that everything sticks together.

Let set. Peel the bark off of the wax paper and brake into pieces.

Enjoy!

Monday, 14 November 2011

Christmas Baking Idea


This year I'm planning to sell some of my baking for Christmas. Here's what I'm planning to bake. If you're interested let me know!

Or if you have a request let me know! 

Post image for Gingersnap Cookies

Ginger Snaps 


Snickerdoodles 


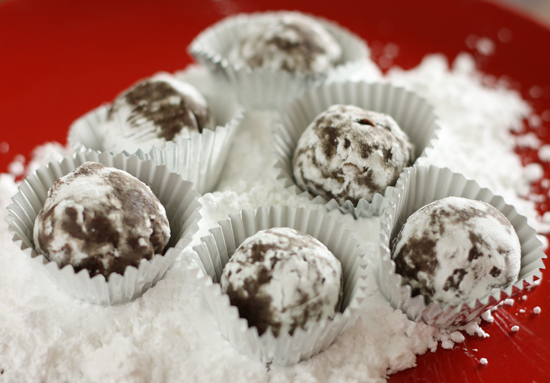
 Chocolate Pixies 


Post image for Rum Balls
Rum Balls 

Two-in-One Holiday Bar 


Rockie Road Fudge Bar

German Chocolate Saucepan Brownies

German Chocolate Saucepan Brownie 

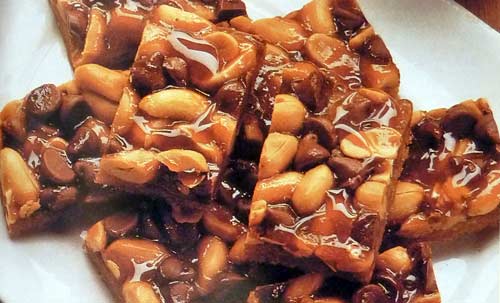
Easy Peanut Britlle Bars
 Peanut Brittle Bars

 Anise Honey Bites

Texas Almond White Chocolate Cookies

Butter Scotch Marshmallow Bar

 Shortbread Cookie Dark Chocolate Bark
Related Posts Plugin for WordPress, Blogger...